Deployment Best Practices
This guide provides design-level deployment guidance for Azure App Service workloads. Use it after platform fundamentals and before language-specific implementation so you can choose a deployment approach that minimizes risk and downtime.
Why Deployment Design Matters
A deployment that "works" is not automatically production-ready. In App Service, reliable deployment design is mostly about controlling blast radius, validating safely, and making rollback predictable.
Good deployment design should optimize for:
- Fast and safe promotion from build to production
- Zero-downtime behavior during normal releases
- Fast rollback when validation fails
- Clear separation between build-time and run-time concerns
- Repeatable automation across teams
Best practice mindset
Treat deployment as a controlled change-management process, not as a file copy operation.
Prerequisites
Before applying these practices, ensure you already have:
- A production App Service plan (avoid free/basic SKUs for critical workloads)
- At least one non-production environment for integration testing
- Source control and protected default branch policies
- CI pipeline that runs tests and security checks
- Deployment slot support available in your App Service tier
Deployment Slots for Zero-Downtime Releases
Deployment slots are the core mechanism for safe App Service releases. The common baseline is:
- Deploy to a staging slot
- Warm and validate staging
- Swap staging into production
- Monitor after swap
Slot Roles and Configuration Boundaries
- Production slot: Serves user traffic
- Staging slot: Receives new build first
- Slot settings (sticky settings): Remain in the same slot during swap
- Non-sticky settings: Move with the app during swap
Configuration drift risk
If you do not explicitly mark sticky settings, swap operations can move the wrong configuration into production.
Baseline CLI Workflow
# Deploy package to staging slot
az webapp deploy \
    --resource-group $RG \
    --name $APP_NAME \
    --slot staging \
    --src-path ./artifacts/webapp.zip \
    --type zip

# Optional: run slot-specific validation checks here

# Swap staging into production
az webapp deployment slot swap \
    --resource-group $RG \
    --name $APP_NAME \
    --slot staging \
    --target-slot production
Portal view: Deployment Center
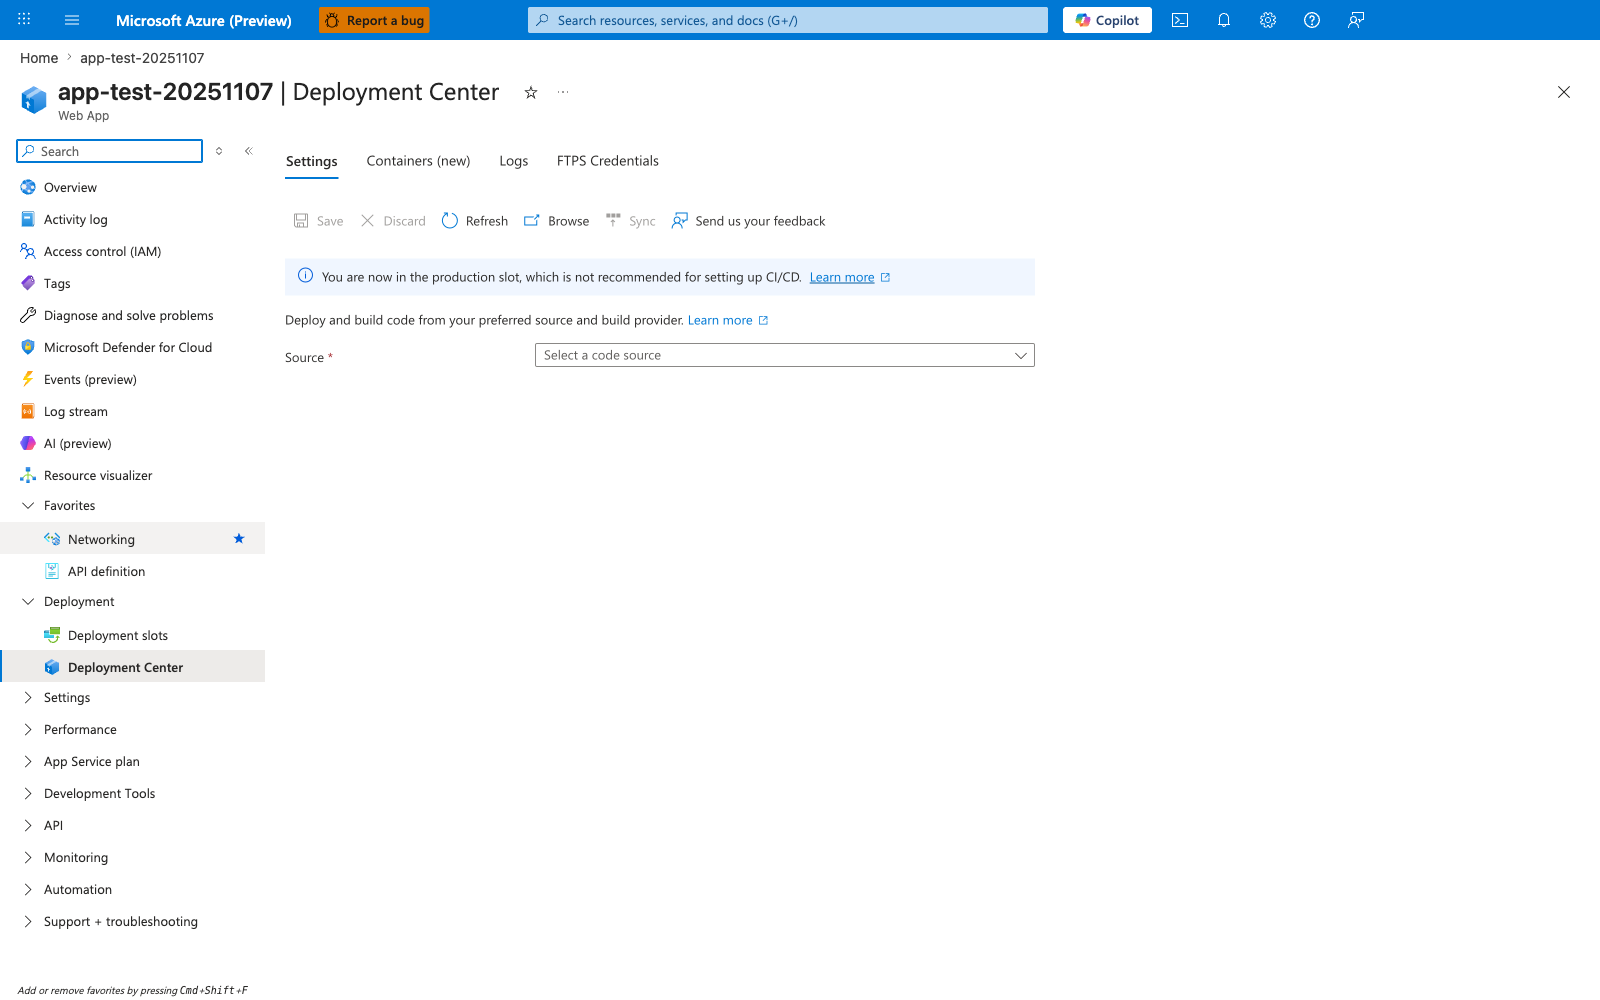
The Deployment Center blade is the policy surface for the slot-first deployment model this section recommends. The prominent "You are now in the production slot, which is not recommended for setting up CI/CD" banner is App Service's own enforcement of the same rule listed in this guide's anti-patterns table: CI/CD wired into the production slot bypasses staging validation and the swap-back rollback option. The empty Source dropdown shows the four tabs that gate the choice between deterministic pre-built artifacts and platform-driven builds — Settings covers GitHub Actions and Azure DevOps source-driven CI/CD, Containers covers registry-driven container image pulls, Logs shows deployment history for rollback evidence, and FTPS Credentials is the legacy publishing path this guide labels an anti-pattern for production. Always configure deployment from the staging slot blade, not this production-slot view.
Deployment Flow with Slots
flowchart TD
    A[Commit to main branch] --> B[CI build and test]
    B --> C[Package artifact]
    C --> D[Deploy to staging slot]
    D --> E[Warm-up and health validation]
    E --> F{Validation passed?}
    F -- Yes --> G[Swap staging to production]
    G --> H[Post-swap smoke tests]
    H --> I[Monitor and observe]
    F -- No --> J[Reject release and keep production unchanged]
    J --> K[Fix and redeploy to staging]
Slot Warm-Up and Auto-Swap
Warm-up reduces cold-start risk during swap. Instead of swapping immediately after deploy, warm the slot with readiness checks.
Warm-Up Strategy
- Use health endpoint checks against staging slot URL
- Verify startup tasks completed (migrations, cache priming, dependency connectivity)
- Confirm app responds under expected latency threshold
# Example: configure health check endpoint for the app
az webapp config set \
    --resource-group $RG \
    --name $APP_NAME \
    --generic-configurations '{"healthCheckPath":"/healthz"}'
Auto-Swap Guidance
Auto-swap can reduce manual steps for simpler workloads, but it should be used carefully.
- Prefer auto-swap only when startup behavior is deterministic
- Avoid auto-swap for releases requiring manual approval gates
- Keep rollback runbook ready even if auto-swap is enabled
Use explicit gates for critical systems
For mission-critical workloads, explicit manual approval after staging validation is usually safer than unconditional auto-swap.
CI/CD Pipeline Patterns
Both GitHub Actions and Azure DevOps are valid. The best pipeline is the one your team can enforce consistently with quality gates.
Pattern A: GitHub Actions (Recommended for GitHub-hosted code)
Key stages:
- Build and unit test
- Security and dependency scanning
- Package immutable artifact
- Deploy to staging slot
- Smoke tests against staging
- Approval gate
- Slot swap
Pattern B: Azure DevOps Multi-Stage Pipeline
Key stages:
- CI stage produces versioned artifact
- CD stage deploys artifact to staging slot
- Environment checks and approvals
- Swap stage promotes to production
Keep build and deploy decoupled
Build once, deploy many. Rebuilding in each environment creates non-deterministic releases.
SCM_DO_BUILD_DURING_DEPLOYMENT vs Pre-Built Artifacts
SCM_DO_BUILD_DURING_DEPLOYMENT=true uses App Service build automation (Oryx/Kudu) during deployment. This is convenient but can introduce variability.
When SCM Build Can Be Acceptable
- Early-stage projects with low compliance requirements
- Prototypes where speed matters more than reproducibility
- Teams without mature CI pipelines yet
Why Pre-Built Artifacts Are Better for Production
- Deterministic build environment
- Repeatable outputs with pinned toolchains
- Faster and more predictable deployment times
- Easier provenance tracking and rollback
# Prefer disabling server-side build for production artifact deploys
az webapp config appsettings set \
    --resource-group $RG \
    --name $APP_NAME \
    --settings SCM_DO_BUILD_DURING_DEPLOYMENT=false
Avoid mixed models
Do not alternate between server-side build and pre-built artifacts for the same app unless you clearly document and control the transition.
Run From Package Deployment
Run From Package mounts a ZIP package as read-only wwwroot. This improves consistency and avoids partial file-copy states.
Benefits
- Atomic package mounting behavior
- Better startup consistency
- Reduced file lock contention
- Easier rollback to previous package
Trade-Offs
- Runtime file writes to app directory are not supported
- Application must externalize mutable state (Storage, database, cache)
# Enable run-from-package mode
az webapp config appsettings set \
    --resource-group $RG \
    --name $APP_NAME \
    --settings WEBSITE_RUN_FROM_PACKAGE=1
Rollback Strategies
Rollback should be designed before you need it.
Primary Rollback Options
- Swap back (fastest with slots)
- Redeploy previous artifact (if swap is not applicable)
- Restore app backup (for broader recovery scenarios)
Rollback Decision Criteria
- If failure appears immediately after swap, swap back first
- If issue is data/schema-related, execute coordinated app+data rollback plan
- If incident scope is unclear, freeze further releases and triage first
Do not improvise rollback
Keep a tested rollback runbook with ownership, commands, and validation checkpoints.
Example Swap-Back Command
az webapp deployment slot swap \
    --resource-group $RG \
    --name $APP_NAME \
    --slot production \
    --target-slot staging
Production Deployment Checklist
Use this checklist before every production promotion:
- Artifact built once and signed/versioned
- Staging slot deployment succeeded
- Health endpoint returns success repeatedly
- Key synthetic transaction tests passed
- Sticky settings reviewed and confirmed
- Observability dashboards ready for release window
- Rollback owner and command path confirmed
Design Recommendations by Maturity Stage
Team Maturity: Early
- Use staging slot + manual swap
- Start with simple smoke tests
- Document rollback basics
Team Maturity: Intermediate
- Build once/deploy many artifacts
- Introduce approval gates and policy checks
- Standardize sticky-setting templates
Team Maturity: Advanced
- Progressive exposure strategies
- Release health scoring with automated rollback triggers
- Centralized deployment governance across app portfolio
See Also
- Platform - How App Service Works
- Operations - Deployment Slots
- Operations - Health and Recovery
- Best Practices - Reliability
- Best Practices - Common Anti-Patterns